
Hi Everybody!
Today I'm excited to share my project for the Cooking With Cricut's Cartridge Showcase. The cartridge showcase is when we feature a Cricut cartridge of our choice and projects we've made with that cartridge. We hope you'll be inspired to pull out your cartridges and find new ways to use them!
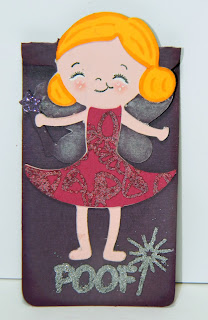
For today's showcase, I chose the Paper Play cartridge. This is geared towards the little ones, but still a very fun cartridge to play with! For my first project I made one of the bookmarks (there are 2) on this cart:


*These would be so fun for a cute, friendly Halloween decoration. Or use some birthday themed patterned paper, and give your "little monster" a MONSTER of a birthday decoration!


Today I'm excited to share my project for the Cooking With Cricut's Cartridge Showcase. The cartridge showcase is when we feature a Cricut cartridge of our choice and projects we've made with that cartridge. We hope you'll be inspired to pull out your cartridges and find new ways to use them!
For today's showcase, I chose the Paper Play cartridge. This is geared towards the little ones, but still a very fun cartridge to play with! For my first project I made one of the bookmarks (there are 2) on this cart:

*I used some Peachy Keen Stamps, embossing powder, and Copic markers to embellish this cut.

*Here is how the bookmark looks opened up.
The next project I have to share is a little home decor project. These cute little monsters are very easy to put together, and super fun to embellish!

*Note: This is also a sneak peek of a set being released from Jaded Blossom this week!


*I even made a couple of them with my kids!
The last project I created is the fun cootie catcher game on this cart. Remember those? I made one of these when I was in school, but definitely didn't use a Cricut to cut it, lol! Here's how you put it together:

*First, cut out all the pieces. The large square is the base cut with the fold marks on it.

*Even if you've never folded one of these before, these fold marks make it MUCH easier. The folding directions are in the handbook.
*I would recommend using patterned paper, or a thinner piece of cardstock as a piece that is too thick would be harder to fold.

*Once you do all the folding, your piece should look like this.

*Here is the game base once it's completely folded.

*After folding, you need to put the numbers on.
*Check the handbook to see where to adhere them.
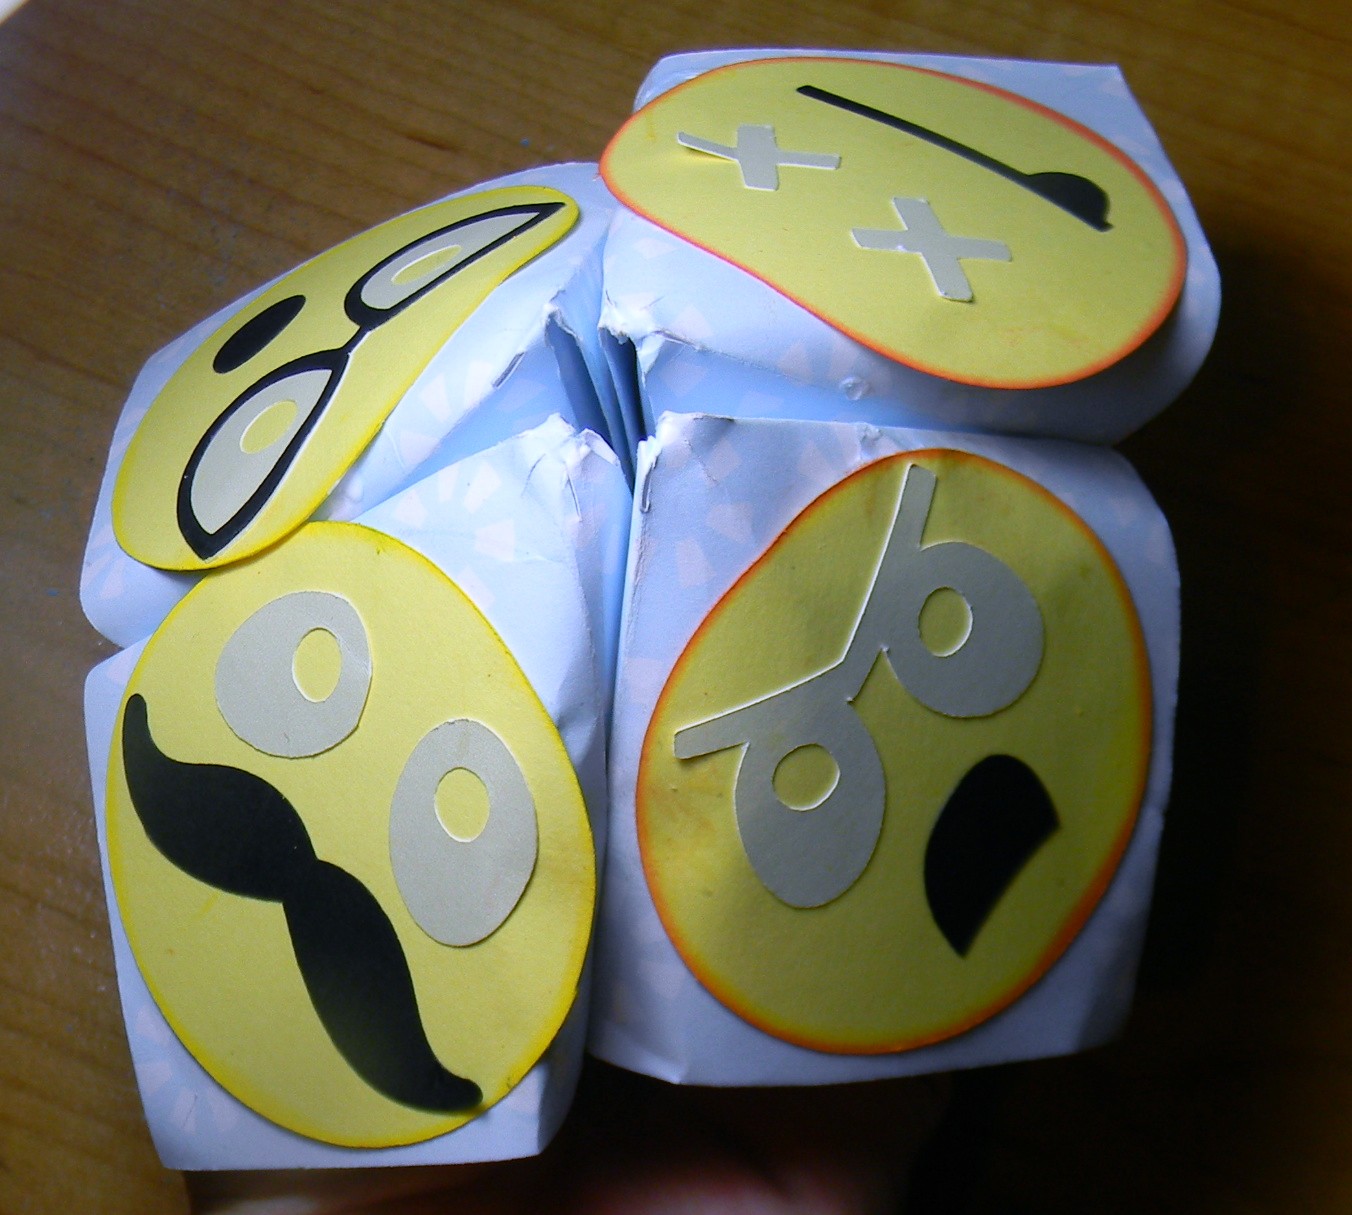
*Then you attach the fun faces that come with this cut onto the outside diamond shapes. Thse were fun and easy to put together!
I hope you have enjoyed today's showcase! I also appreciated how they made a lot of the cuts with boy and girl options! I am a huge fan of off-the-page projects, so this was the perfect cartridge. TFL, and hope everyone has a chance to craft today :O)


Cute Creations the kids did a great job on theirs too.
ReplyDeletevery cute!! I love the cootie catcher! Those are so fun to make!
ReplyDeleteKim :)
Jenny you are amazing! I love the kids creations! thanks for sharing them too!!
ReplyDeleteOh wow Jenny..I have this cart and never even looked at it yet...thank you for the very cute introduction!
ReplyDeleteI remember the "cootie cahtchers" ha ha , forgot how to make them, thanks for the reminder, brought back some good memories.
ReplyDelete