I am sooooo excited to be participating in the Adornit Blog Hop!! I decided to make a little Christmas Tree gift box. It's very cute, but.......thrifty to make, which I know all of us can appreciate!

This is what it looks like empty. But what good is an empty treat box? So I filled it with red and green skittles:
Here's the materials you'll need:
*TBBM, and Christmas Noel cartridges
*Grafix Clear Craft Plastic (I found it at Michaels, and used a coupon to make it more budget friendly! I used a 6 x 12 size piece. They come in 12 x 12 or 8 1/2 x 11 sizes. )
*acrylic paint (I used Making Memories in Meadow color)
*paint brush
*bone folder
*DCWV Citrus cardstock stack
*adhesive (I used a Xyron machine to apply adhesive to the swirly tree)
*glue dots
*ribbon
*brown paint, or small piece of brown cardstock
Now let's put it together:
- Cut out tree shape (pressure @ max, and blade depth @6). If you have an Expression, then you will need to select the multi-cut button. If you have a baby bug, then just make sure you start your blade in the same spot you started, select repeat last, and cut again. I used the fit to page option. My tree was cut @ 5 1/2 ".
- Paint section of tree box without the tabs green.
- Paint outter tab ONLY green.
- On section of tree painted green, paint middle section ONLY for trunk brown. You can also insert a brown piece of cardstock.
- While waiting for the paint to dry, use the Noel cart to cut the swirl tree out of shiny, foil paper. You can also just cut it out of red cardstock, and/or spray it with red Glimmer Mist if you still want a little shimmer. I cut it @ 5 1/2". You will need to trim it a little bit to have all the edges fit onto the tree box.
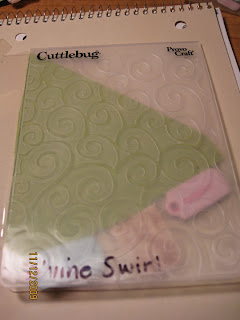
- You can also choose to emboss the part of the tree painted green. If you choose to do this step, make sure you have a little thicker coat of green. Otherwise, the paint may crack when put through the embossing machine.
- Add adhesive to the swirl tree. I ran mine through a Xyron machine. If you do use a Xyron, be sure to clean out the glue that shows in between the swirls.
- Score tree box. Follow the "tic" marks made by the Cricut. Be sure to use a bone folder! The plastic is not too hard to fold, but you will need to make sure you use enough pressure to get a good crease.
- Now you just need to assemble the box. Take your time on this step, so you don't apply any adhesive where you don't want to! Leave the bottom of the trunk open if you are choosing to add a treat inside the box. (Another option is to put the swirl tree on the inside, and add a person's name on the outside, and voila! you have a cute place setting!)Once your box is put together, then tie your ribbon onto the trunk of the tree for that finishing touch.


!BONUS IDEA!
Put the swirl tree on the inside, and add a person's name on the outside, and voila! you have a cute place setting!
!BONUS IDEA #2!
I got this idea over from Sophia's blog (#21 on the hop), that this could also just be hung from a tree as an ornament. You could also put a picture on the inside to personalize it even more!
I hope you enjoyed my project! Please continue hopping over to the next stop at Whimsical Ink Sorority at http://whimsicalinksorority.blogspot.com/ and check out her really cute project! Please make sure you start at the beginning of the hop so you don't miss anything! Click here to start at the beginning: http://www.adornitscrapbook.com/bloghop . Enjoy!


Love the idea!very unique and pretty!
ReplyDeleteVery cute and creative!!!! Will be using this idea later today! Thanks for the inspiration
ReplyDeleteVery cute and creative! TFS!
ReplyDeletefantastic idea and very thrifty :D
ReplyDeleteGreat idea!!!
ReplyDeleteOh this is soooo CUTE!! I love the tree shape!!
ReplyDeleteHappy Hopping!
WOW what amazing things you can do with a Cricut!! Love this project!!
ReplyDeleteWhat a great project! Thanks!
ReplyDeleteThat is really unique idea. I love it. I am so happy you played along with us... sending you Adornit Cyber Hugs.
ReplyDeleteSo cute, TFS!
ReplyDeleteSuper cute, love it!!!
ReplyDeleteNow I want that embossing thing! LOL!
ReplyDeleteWhat a lovely gift idea ... tfs ...
ReplyDeleteVery cute!
ReplyDeleteI may try this
ReplyDeleteWow this is such a fun idea... now if only I had the machine with which to make it... too much cutting by hand!
ReplyDeleteThanks for sharing in the blog hop with me.
Thanks for the inspiration. I need to use my cricut more often.
ReplyDeleteWonderful project!!! I also need to pull out my cricut more! Thanks for stopping by my blog(:
ReplyDeleteGreat idea!
ReplyDeleteso cute - thanks for posting!
ReplyDeletehow cool is that a really neta christmas gift thansk for sharing:)
ReplyDeleteThis is an AWESOME project ! I love the clear box idea and running it through the cuttlebug is genius !!! Thanks for visiting the BBTB2 site !
ReplyDelete